This tutorial assumes you have already flashed ArduPilot on your Pixhawk and finished the needed calibrations
Requirements
- Pixhawk (for this tutorial, 2.4.8 was used, the same process should follow for other versions)
- Vicharak Axon
- 3x Female-female jumper cables (Optional)
- 6-pin female connector (to connect to TELEM1) (Optional)
- Micro-USB cable (To connect Vicharak Axon with Pixhawk)
Procedure (To only connect TELEM2)
Note about TELEM2
Note that this method WILL NOT give commands/instruct Pixhawk. This port is only meant for receiving parameters/readings from Pixhawk during the flight.
0. Set the following parameters in your ArduPilot Parameters file
This can be done using MissionPlanner or QGroundControl.
Change the parameters as follows
SERIAL2_PROTOCOL = 2
SERIAL2_BAUD = 921
Restart the device normally to ensure the parameters are written.
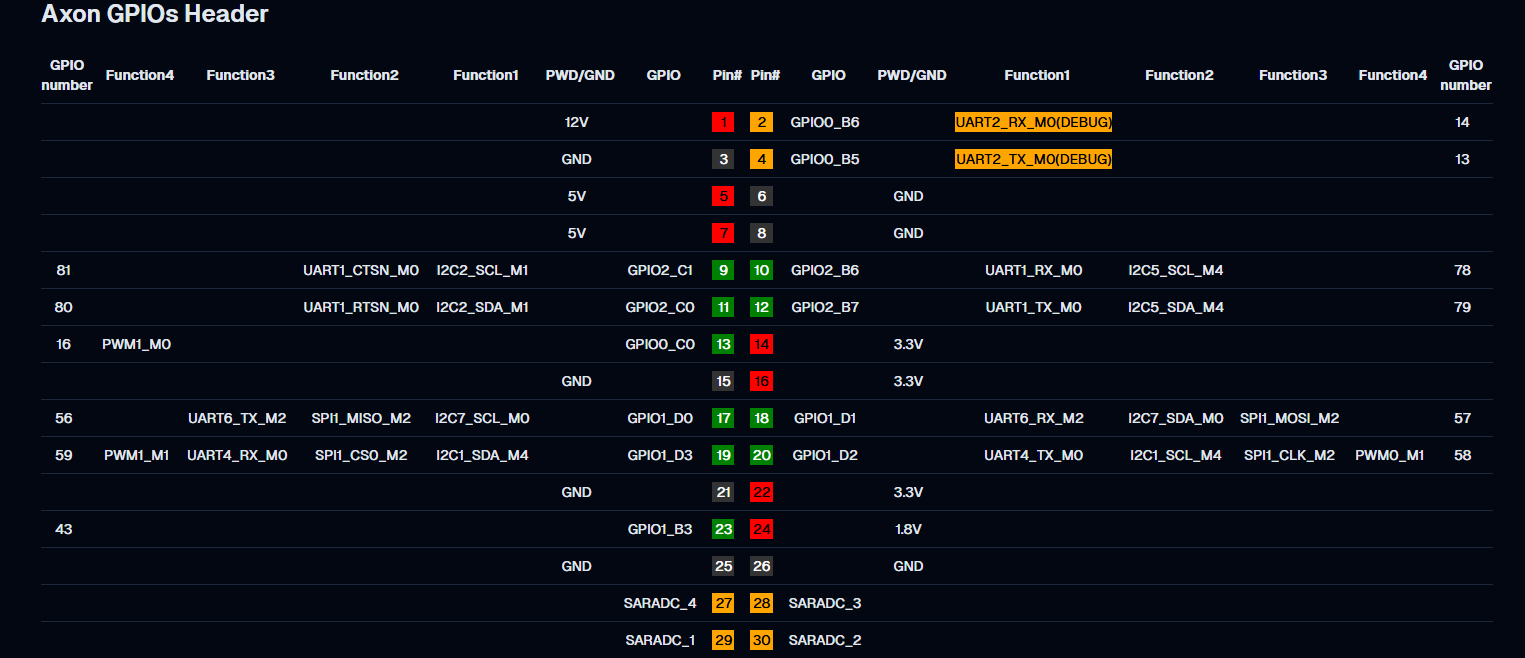
1. Ensure UART is enabled by checking in vicharak-config
Search for vicharak-config in the search bar or run sudo vicharak-config in the terminal
Head over to Overlays -> Press "Yes" -> Select "Enable UART1 on 30 Pin GPIO Header Axon v0.3" -> Press "Ok" on the bottom
Note on UART ports
You are free choose whatever UART port you think is comfortable for you and modify your connections accordingly

You will now be prompted to reboot in order applying the settings.
Verify if the UART port has been enabled by running ls /dev/ and checking if ttyS1 exists
Note for using other UART ports
Your serial device may vary depending on the UART ports enabled in vicharak-config, the device must be /dev/ttySX where X is the UART port number enabled
2. Make the needed connections
These are the pinouts of the TELEM2 port on Pixhawk
| Pin | Signal | Voltage |
|---|---|---|
| 1 (Red) | VCC | +5V |
| 2 (Black) | UART5_TX (out) | +3.3V |
| 3 (Black) | UART5_RX (in) | +3.3V |
| 4 (Black) | UART5_CTS (in) | +3.3V |
| 5 (Black) | UART5_RTS (out) | +3.3V |
| 6 (Black) | GND | GND |
However, we will not be needing pins 1, 4 and 5.
Connect pins (from Pixhawk) 2, 3 and 6 to Axon’s GPIO pins 10, 12 and 8 respectively, or follow the table as follows
| Pins (Pixhawk) | Pins (Axon) |
|---|---|
| UART5_TX (2) | UART1_RX_M0 (10) |
| UART5_RX (3) | UART1_TX_M0 (12) |
| GND (6) | GND (8) |
You can also find the respective pins on bottom of Axon in case you are not sure about the connections you have made

3. Give access to users to access the port
By default, only root is allowed to access the serial devices. Generally, the policy to allow reading serial devices is only given to dialup group in linux
Try $ sudo usermod -aG dialup $USER to add yourself to the dialup group. Logout and log back in to see the effects
In case you don’t wish to screw around with the groups and want to give all users the access to only the specific serial device
$ sudo chmod a+rw /dev/ttyS1
Note for using other UART ports
Replace 1 above with another UART port that you may have enabled
4. Create a python virtual environment and install needed dependencies
Assuming you are using Ardupilot, you can interact with Pixhawk in a variety of different ways. The most commonly used library for interfacing with Ardupilot is DroneKit.
DroneKit, however, tends to work best python3.9.
To get python3.9, add the deadsnakes PPA, which allows you to install and use older versions of Python which may no longer be in Ubuntu’s repositories
$ sudo apt install software-properties-common
$ sudo add-apt-repository ppa:deadsnakes/ppa
$ sudo apt install python3.9 python-venv3.9
Create a new Python environment (preferably in a folder of your choice where you will be managing rest of your scripts)
$ python3.9 -m venv hello_dronekit
$ source ./hello_dronekit/bin/activate
$ pip install pyserial dronekit MAVProxy mavsdk
This should suffice with almost any possible interaction you may need with Pixhawk.
You are encouraged to read through each library’s documentation to make the best possible use out of them
5. Test your setup
If you have followed all the instructions thus far, there should be nearly no issues in this step. Simply run (after activating the virtual environment)
$ mavproxy.py --master=/dev/ttyS1 --baud=926100
If all goes well, you should see a screen similar to this (ignore the sudo)

AttributeError: module 'collections' has no attribute 'MutableMapping'
Python regularly makes changes to its dependency structure, which may cause issues like these to show up. To fix this, make the following changes:
| Line | From | To |
|---|---|---|
| 1 | import collections | from collections.abc import MutableMapping |
| 2689 | class Parameters(collections.MutableMapping, HasObservers) | class Parameters(MutableMapping, HasObservers) |
Alternative Procedure (Using MicroUSB)
If the method above seemed tricky to get working, there is fortunately an alternative (and much easier) method to get going
In contrast to TELEM2, using MicroUSB allows 2-way communication between Axon and Pixhawk - meaning you can send commands and make work with complex scripts
1. Give access to users to access the port
By default, only root is allowed to access the serial devices. Generally, the policy to allow reading serial devices is only given to dialup group in linux
Try $ sudo usermod -aG dialup $USER to add yourself to the dialup group. Logout and log back in to see the effects
In case you don’t wish to screw around with the groups and want to give all users the access to only the specific serial device
$ sudo chmod a+rw /dev/ttyACMX
Depending on which USB port is used, X can be 0 or 2 (rarely even 1). You can verify the value of X by verifying the output of $ ls /dev/
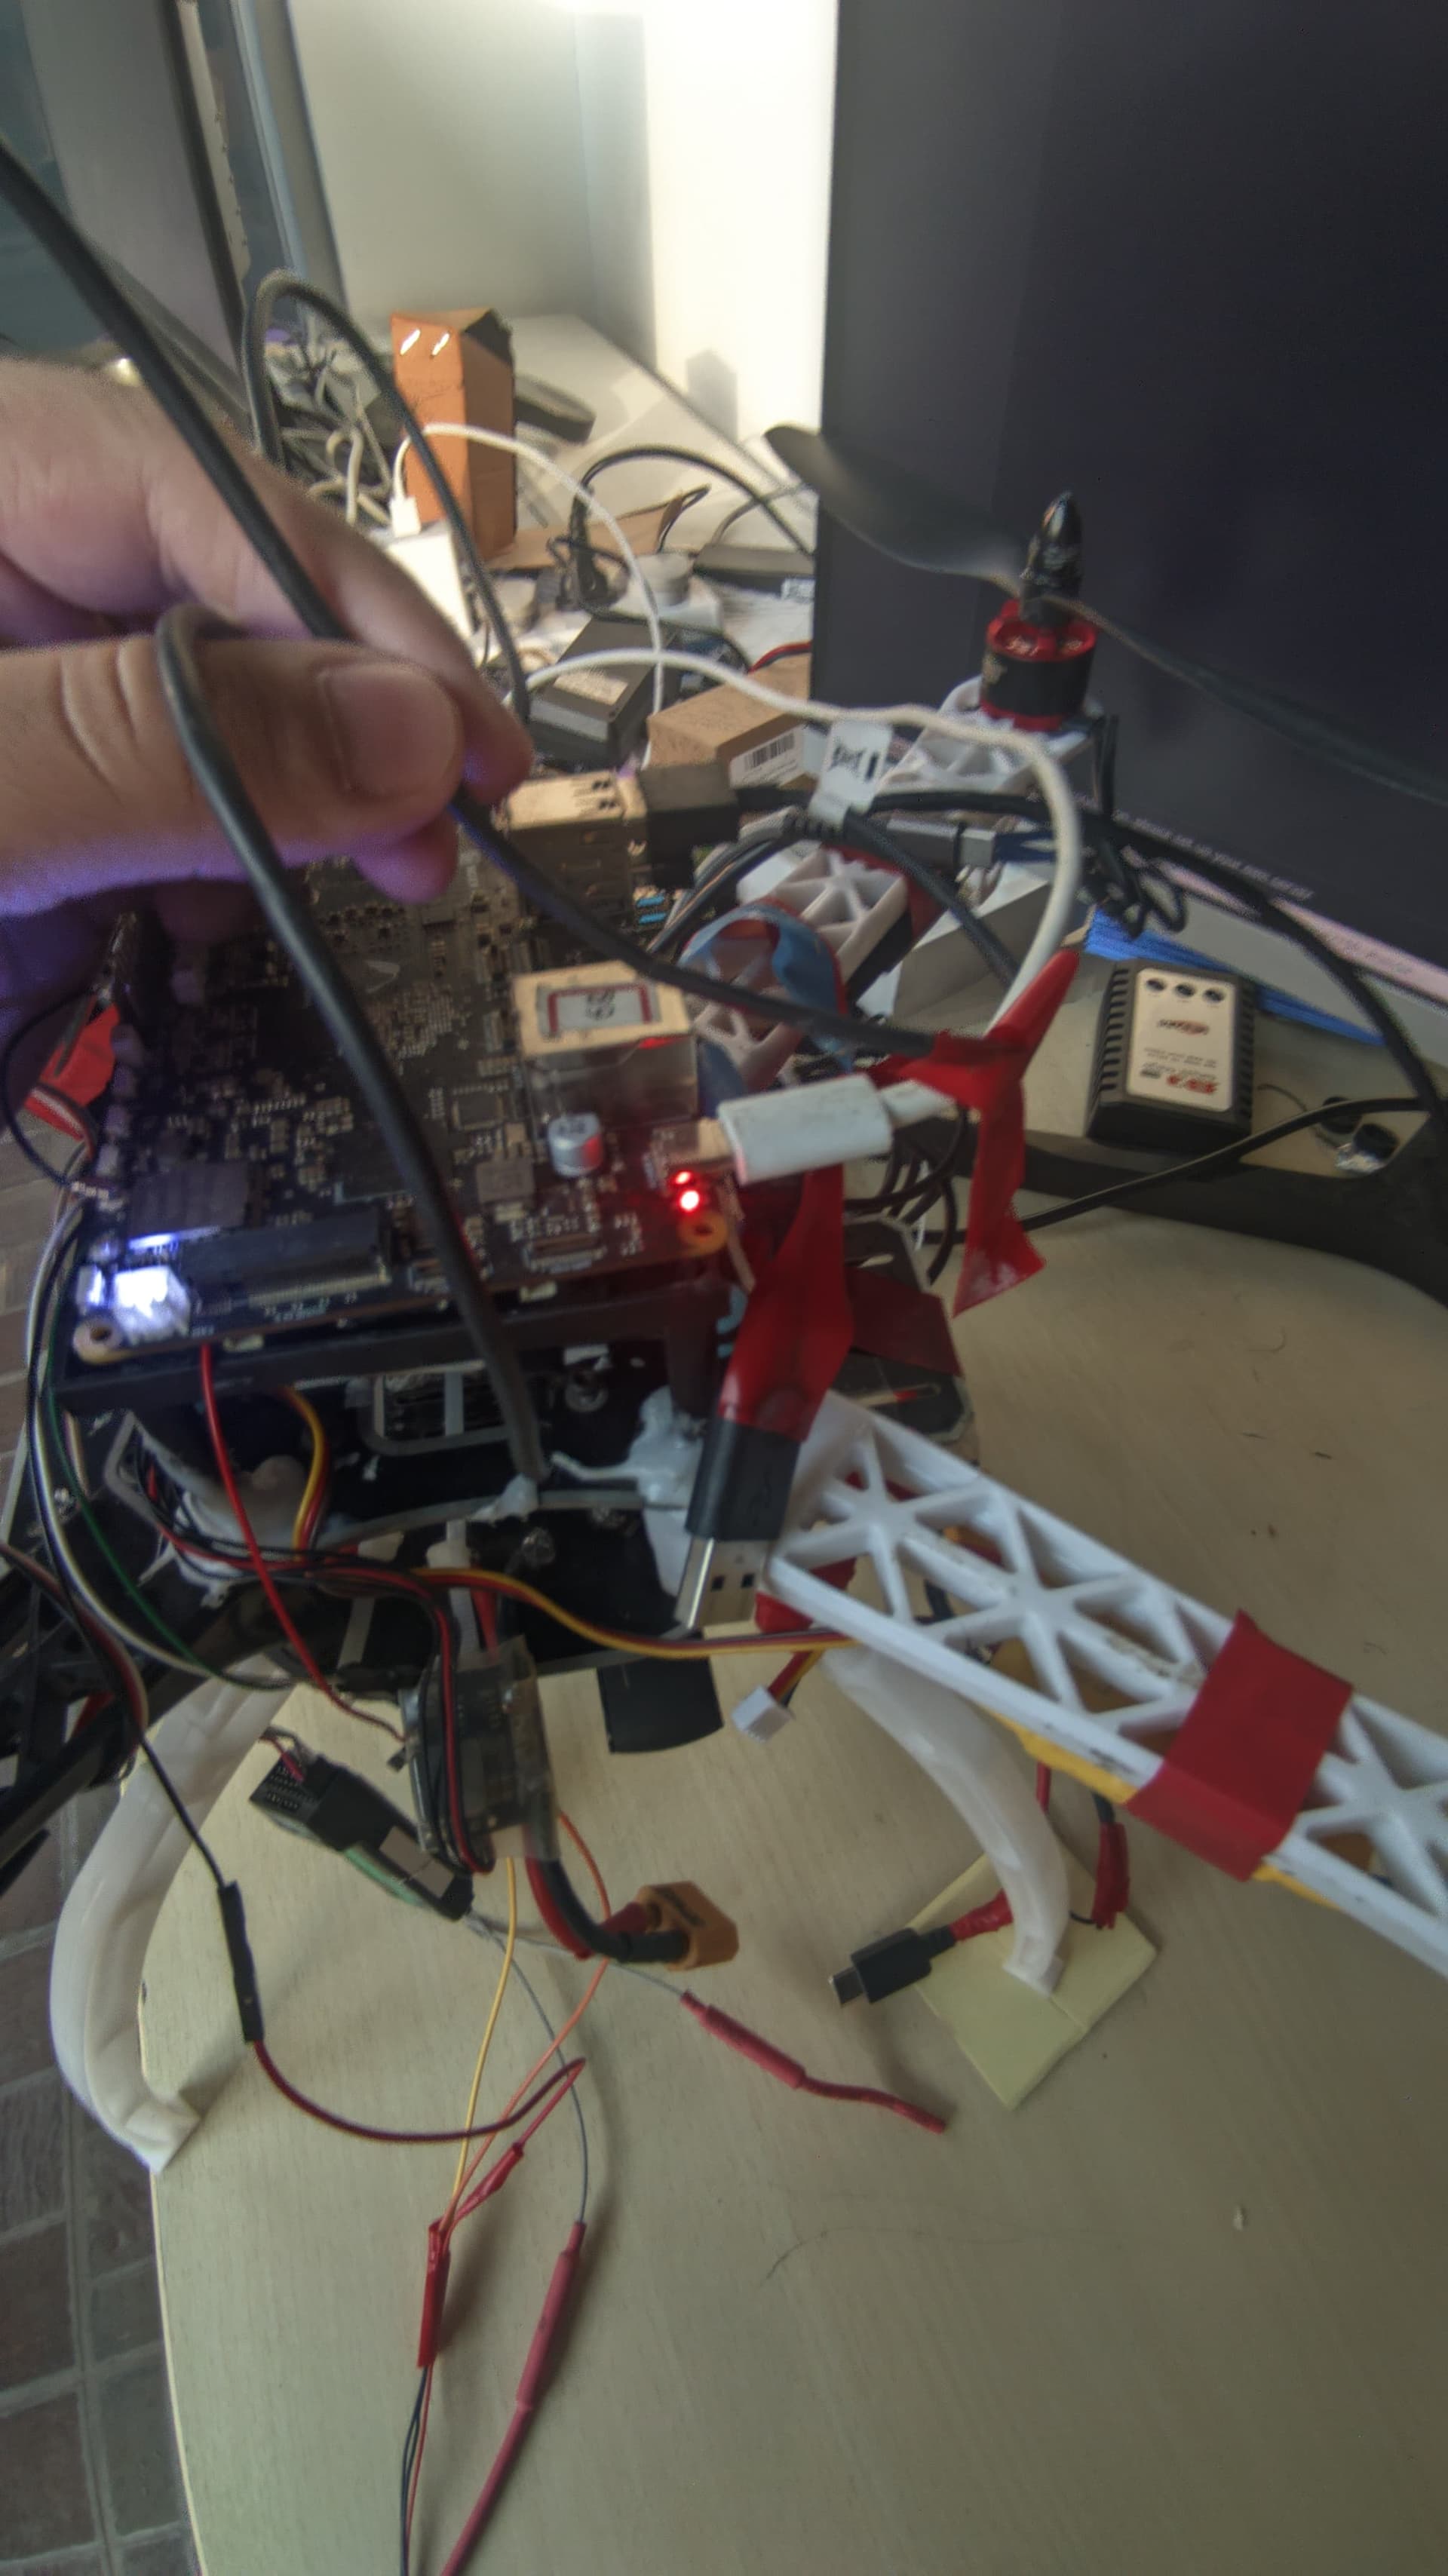
The physical connection is very straightforward as shown in the image
2. Create a python virtual environment and install needed dependencies
Assuming you are using Ardupilot, you can interact with Pixhawk in a variety of different ways. The most commonly used library for interfacing with Ardupilot is DroneKit.
DroneKit, however, tends to work best python3.9.
To get python3.9, add the deadsnakes PPA, which allows you to install and use older versions of Python which may no longer be in Ubuntu’s repositories
$ sudo apt install software-properties-common
$ sudo add-apt-repository ppa:deadsnakes/ppa
$ sudo apt install python3.9 python-venv3.9
Create a new Python environment (preferably in a folder of your choice where you will be managing rest of your scripts)
$ python3.9 -m venv hello_dronekit
$ source ./hello_dronekit/bin/activate
$ pip install pyserial dronekit MAVProxy mavsdk
This should suffice with almost any possible interaction you may need with Pixhawk.
You are encouraged to read through each library’s documentation to make the best possible use out of them
3. Test your setup
If you have followed all the instructions thus far, there should be nearly no issues in this step. Simply run (after activating the virtual environment)
$ mavproxy.py --master=/dev/ttyACMX --baud=926100
If all goes well, you should see a screen similar to this (ignore the sudo)
AttributeError: module 'collections' has no attribute 'MutableMapping'
Python regularly makes changes to its dependency structure, which may cause issues like these to show up. To fix this, make the following changes:
| Line | From | To |
|---|---|---|
| 1 | import collections | from collections.abc import MutableMapping |
| 2689 | class Parameters(collections.MutableMapping, HasObservers) | class Parameters(MutableMapping, HasObservers) |
Conclusion
Hope I have done a decent job gently introducing you to interfacing Pixhawk with Vicharak Axon
You can look into further resources as linked below:
DroneKit’s Documentation
DroneKit’s Github Repository
ArduPilot’s Documentation
MavSDK-Python API Reference
MavSDK-Python Github Repository
Reply to the thread or reach out to me for any further assistance!